Disclosure: This post may contain affiliate links. I may earn a small commission for my endorsement, recommendation, testimonial, and/or link to any products or services from this website.
This Easy Vegan Crème Brulee is made with a creamy, coconut-free vanilla custard and a caramelized sugar topping. A no-bake, fuss-free dessert that feels so fancy! Vegan and Gluten-Free.
This recipe for Vegan Crème Brulee puts an eggless and dairy-free spin on the classic French dessert. It’s rich and creamy with a hint of vanilla and has a hardened sugar topping that is so much fun to crack open. Whether it’s Valentine’s Day, a regular Friday night, or you’re hosting a dinner party, this easy no-bake treat is a must-try!
Table of Contents

All About This Timeless French Dessert
If you’ve ever assumed that crème brulee was too hard to make at home, think again. My Vegan Crème Brulee Recipe is a coconut-, egg-, and dairy-free take on the classic French dessert, and you’ll be shocked at how simple it is to make. Believe it or not, it’s actually easier to make than the classic version!
Crème brûlée literally translates to “burnt cream” in English, which makes sense when you discover that it’s made with a rich vanilla cream (or custard) and a burnt sugar topping. The vegan custard requires less than 20 minutes of hands-on work before it’s left to set in the fridge. But the last part—torching the top layer of sugar—is so much fun and well worth the wait!
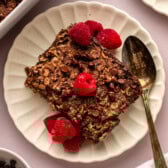
Crack open that layer of caramelized sugar with your spoon and scoop up the indulgent bites to celebrate this elegant no-bake treat.
Ingredients for Vegan Crème Brulee
A traditional crème brulee is made with egg yolks, sugar, and heavy cream, which is why it’s so rich and indulgent. But in this eggless crème brulee, we’re using a handful of plant-based ingredients to make a vegan vanilla custard that’s just as creamy as the classic. Here are the key items you’ll need:
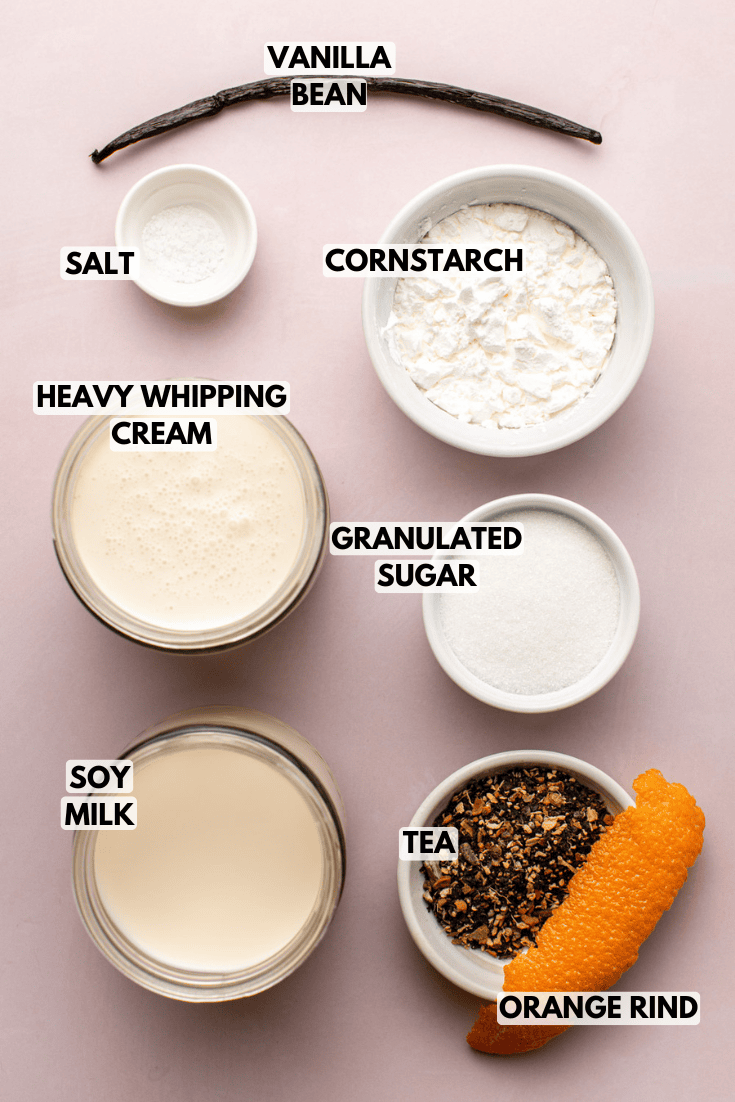
- Soy Milk: try not to substitute this for another non-dairy milk. With its high protein content and creamy texture, soy milk yields the thickest and smoothest custard.
- Cornstarch: when heated, cornstarch thickens the custard to help it form a sturdy yet silky smooth consistency.
- Vegan Heavy Whipping Cream: a 1:1 mix of soy milk and dairy-free heavy whipping cream gives you a very rich and creamy vegan custard you’ll think was made with dairy and eggs.
- Sugar: granulated white sugar sweetens the custard and is sprinkled on top for the signature caramelized sugar ceiling.
- Vanilla: if you can get your hands on vanilla bean pods, use one here! You can’t beat the delicate vanilla flavor and black specks throughout the custard. Otherwise, vanilla bean paste or vanilla extract will do just fine.
How to Make Vegan Crème Brulee
- Whisk the soy milk and cornstarch together in a small bowl.
- Pour the soy milk mixture, whipping cream, and sugar into a pot. Heat over medium heat and whisk to remove any clumps.
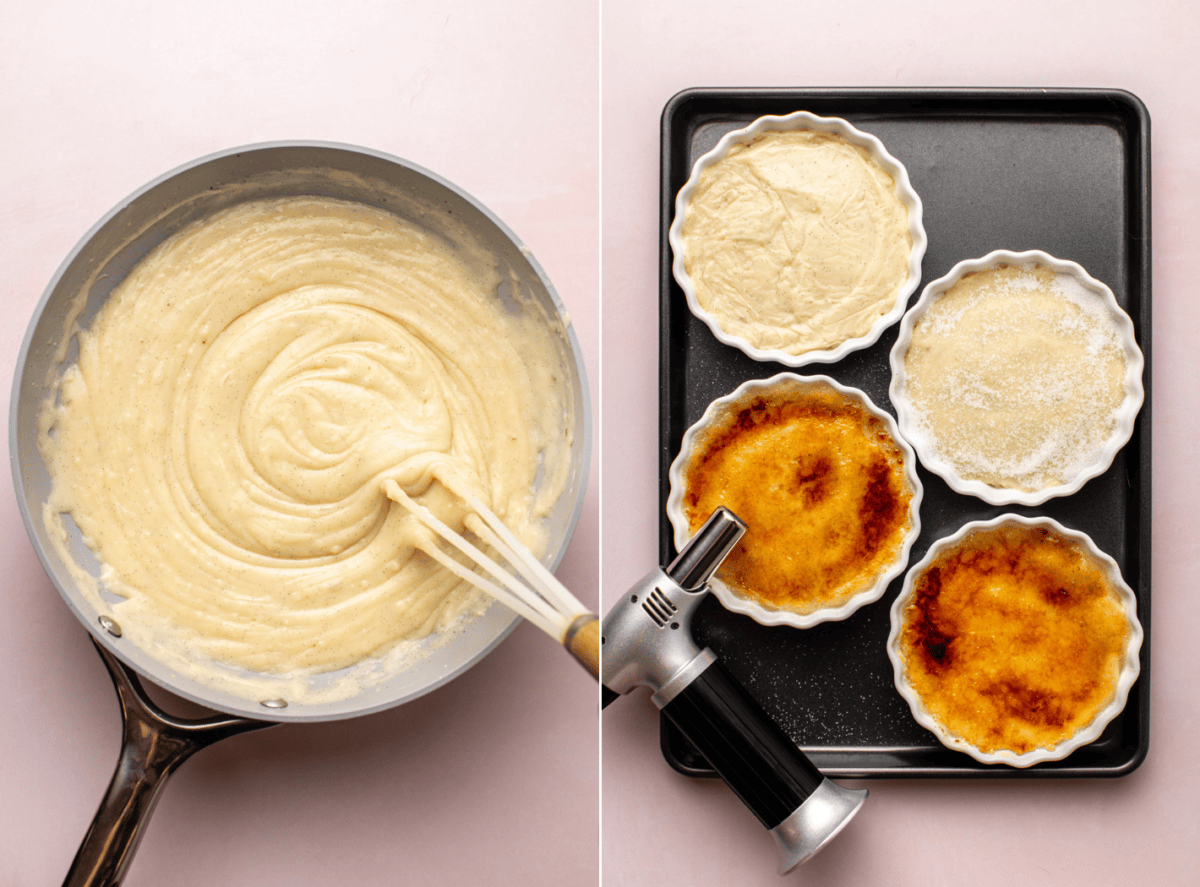
- Once the custard begins to steam, whisk it constantly until it thickens.
- Divide the custard between the 4 ramekins. Smooth the tops with a spatula, then cover each one with a sheet of plastic wrap. Chill the custard in the fridge until they’re set.
- Sprinkle sugar over the top of each crème brûlée. Torch the tops with a culinary torch until the sugar is bubbling and golden brown. Set them aside to let the sugar ceiling cool and harden.
- Serve immediately after and enjoy.
Caitlin’s Cooking Tips
- Your custard should coat the back of a spoon when it’s ready. If it’s too thin or drippy, keep cooking and whisking it until it thickens.
- We can’t have crème brulee without the burnt sugar topping! For this, you need a culinary torch. It’s a fun and surprisingly affordable kitchen tool you can pick up at any kitchen supply store.
- For a perfectly torched sugar topping: I like to rotate each ramekin as I’m sprinkling the sugar over the custard to evenly cover the top. When it comes to torching, continuously move the flame in small circles, browning small sections of sugar at a time before moving to the next area.
Serving Suggestions
This recipe makes 4 dairy-free crème brulees, which means everyone gets their own for dessert. Or, if you’d rather, save one or two for yourself—I won’t judge!
With its elegant vanilla flavors, vegan crème brulee is a wonderful dessert all on its own or with a few sophisticated toppings. Think fresh raspberries, blackberries, mint leaves, or a vanilla pod (for presentation only).
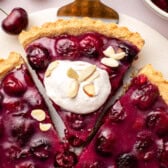
If you’re looking for more date-worthy vegan desserts, you’ll also love this Vegan Chocolate Pie, this Vegan Instant Pot Cheesecake, these Vegan Berry Tarts, and this Vegan Strawberry Upside Down Cake!
How to Store Leftover Crème Brulee
The vegan custard can be made and divided between the ramekins up to 2 days ahead of serving. Cover each custard-filled ramekin with plastic as normal and chill them in the fridge until you’re ready to serve with the burnt sugar topping.
The leftover crème brulee can be stored in the fridge for 1 or 2 days as well. The caramelized sugar will soften over time but your dessert will still be tasty.
Freezing is not recommended.
Substitutions and Variations
- Soy Milk Substitute: Soy milk is the best milk for non-dairy crème brulee but if you can’t use it, go with a full-fat, creamy oat milk instead. Stay away from store-bought almond or cashew milk, though, as they are both too thin.
- Cornstarch Substitute: This recipe works with 1/4 cup + 2 tablespoons of arrowroot powder instead. It does not thicken the cream as well as the cornstarch, which is why you need to use a little more.
- Heavy Whipping Cream: Use an additional 1 cup of soy milk instead and stir 2 tablespoons of unsalted dairy-free butter into the cream during step 3 to add some richness.
- Flavor Options: You can customize the flavor of the vegan custard by simmering a piece of orange rind, lemon rind, or 2 bags of chamomile, Earl Grey, or chai tea in the cream on the stove. Remove and discard the rind/tea bags when the custard is ready.

Recipe FAQs
Vegan crème brulee is silky smooth, sweet, a little tangy, and has just the right amount of vanilla. The burnt sugar topping adds extra sweetness and some texture, too.
Use 4 heat-safe bowls or cups instead. You can also pour the custard into one large ramekin or a regular round pie dish if you’re serving a crowd.
Yes. I tried brûléeing the ramekins under the broiler in the oven, but this heated the crème brûlée custard up too much and it becames soupy.
Enjoy! If you make this recipe and decide to share it on Facebook or Instagram, don’t forget to tag me @FromMyBowl + #FromMyBowl! I would also love it if you could leave a comment below with a recipe rating! Thank you for the support 😊

Vegan Crème Brulee
Ingredients
For the Custard:
- 1 cup soy milk
- 3 tablespoons cornstarch*
- 1 cup vegan heavy whipping cream*
- 1/4 cup granulated sugar
- 1 vanilla bean or 1 teaspoon vanilla extract or paste
- 1/8 teaspoon kosher salt
- Optional: piece of orange rind and/or 2 tea bags like chamomile earl grey, or chai tea
For the Sugar Coating:
- 1/4-1/2 cup granulated sugar as needed
Other Supplies:
- 4 6-8 ounce Ramekins
- Baking Sheet
- Plastic Wrap
- Culinary torch*
Instructions
- Prep: Set the ramekins, baking sheet, and plastic wrap off to one side. You will want to move quickly once the creme brûlée mixture has thickened.
- Whisk: Add the soy milk and cornstarch to a small bowl or measuring cup and whisk vigorously until the cornstarch is fully dissolved.
- Make the Cream: Place a medium sauté pan or pot over a burner, but do not turn the burner on yet. Add the soy milk mixture, whipping cream, sugar, vanilla, and salt to the pan and mix well. Turn the heat on to medium, whisking occasionally to ensure there are no clumps in the cornstarch.
- Simmer: Begin the whisk the mixture constantly once it begins to steam; continue to cook it for an additional 5 to 7 minutes, until the mixture has thickened and coats the back of a spoon.
- Fill the Ramekins: Immediately divide the mixture between the 4 ramekins. Use a spatula to smooth the top of the crème brûlée on each ramekin, but keep in mind that the sugar will cover it later so it doesn’t need to be perfect. Place each filled ramekin on the baking sheet.
- Cover: Cut a large sheet of plastic wrap and place it gently over the baking sheet. Press the plastic wrap over the top of each ramekin so it completely covers the crème brûlée filling, then secure it to the edges of the baking tray. You can also cut 4 individual squares of plastic wrap, but I prefer to use one larger sheet as it is less finicky.
- Chill: Place the baking sheet in the refrigerator and let it sit for at least 3 hours, until chilled and set. You can store the covered crème brûlée for up to 2 days covered like this.
- Brûlée: Remove the ramekins from the fridge and discard the plastic wrap. Working one ramekin at a time, sprinkle the top of the crème brûlée with 1 to 2 tablespoons of sugar, rotating the ramekin so every portion of the top is covered with a layer of sugar. Use a culinary torch to brûlée the sugar until it is bubbling and golden brown. I find it best to continuously move the torch in small circles, working on browning small sections of the ramekin at a time before moving on to the next area. Repeat with the remaining ramekins.
- Serve: Let the ramekin sit for at least 5 minutes, to allow the sugar to cool slightly and harden. Serve immediately after.
Recipe Notes
- Cornstarch Substitute: You can also make this recipe using 1/4 cup + 2 tablespoons of arrowroot powder; it does not thicken the cream as well as the cornstarch, so you need to use a little more.
- Heavy Whipping Cream: If you cannot find dairy-free whipping cream you can replace it with 1 additional cup of soy milk. I recommend also adding 2 tablespoons of unsalted dairy-free butter to the ingredients in step 3 to add some richness back to the cream.
- Soy Milk: I recommend using soy milk in this recipe as it has a higher protein content and a creamy texture. You can also use a creamy oat milk if you prefer, but I don’t recommend using store-bought almond or cashew milk as they are much thinner
- Culinary Torch: there is no substitute for a culinary torch in this recipe (though on the bright side, it’s a really fun kitchen tool!) I did test bruleeing the ramekins in the oven broiler, but unfortunately this heated the crème brûlées up too much and they turned soupy.


Made this a few times and loved it.. couldn’t tell difference between vegan and full fat one.
Didn’t have a torch, but caramelized sugar in pan and poured on top.
Sounds delish and I’m glad you found a work around!
Thank you for the inspiration and perfect timing!
Today is our 37th wedding anniversary and this was (before we became vegan) my husband’s favorite dessert to order.
I did a few things different, but wouldn’t have thought of making it without seeing your YouTube.
Used all soy milk, adding 2 extra tbsp corn starch and the 2 tbsp plant butter you suggested. Also subbed black salt for the Kosher salt to give it a bit of eggy flavor and “cooked” it in the Vitamix!
So far the custard is excellent, so smooth and creamy.
Will enjoy the full experience melting and cracking through the sugar later tonight.
Happy anniversary Lynn! I hope you both enjoy the treat!
When do we add the vanilla? I have not used an actual vanilla bean before so how do I add it?
I apologize, the instructions were not clear on this so I updated the recipe! You add the vanilla bean or vanilla extract with the rest of the ingredients in step 3. If using a vanilla bean, I recommend cutting it lengthwise with a sharp knife, then using the back of the knife to scrape out the vanilla seeds (they’ll look like a black paste).
delicious!!!
Thank you!